What is DTG Pretreatment?
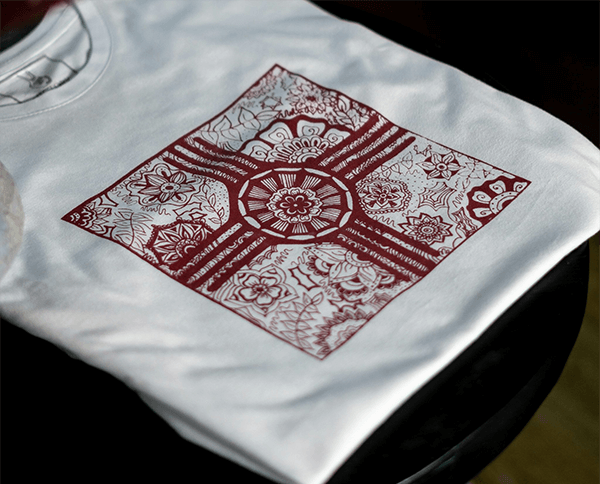
In DTG (Direct to Garment) printing, pretreatment is an essential step before printing. It involves spraying or applying a specialized pretreatment solution onto the garment, preparing the fabric surface to optimally receive ink. This ensures the printed design achieves vibrant colors, sharp details, and durability.
The pretreatment solution typically contains water, polymers, binders, and functional additives. It forms a semi-permeable protective layer on the fabric surface, controlling the ink’s penetration. For dark-colored garments, this layer is especially important—it prevents white ink from being absorbed into the fibers, maintaining a highly opaque base layer so that colored inks appear bright and vivid.
Chemically, pretreatment smooths the microfibers on the fabric surface and imparts a cationic charge, which attracts the anionic pigments in the ink, ensuring strong adhesion during curing. This improves color accuracy and enhances print durability and wash resistance.
Commercial pretreatment solutions are usually supplied in concentrated form and can be diluted according to fabric type (cotton, cotton-polyester, blends, etc.) in ratios from 1:1 to 1:4 to achieve optimal results. Pretreatment is not only for dark garments; light-colored fabrics also benefit from it, resulting in brighter colors and higher-quality prints.
In short, the core purpose of DTG pretreatment is to transform an absorbent fabric into a smooth, ink-receptive surface, providing a stable foundation for high-quality prints with vivid colors, detailed designs, and long-lasting durability.
Why Perform DTG Pretreatment?
DTG printing uses water-based pigment inks, which, without pretreatment, are quickly absorbed by the fabric fibers, causing issues such as:
Dull colors lacking vibrancy;
Blurry edges and unclear details;
White ink soaking into the fabric, failing to form a solid base.
Pretreatment forms a thin, even ink-receptive layer on the fabric surface, keeping the ink on the surface rather than allowing it to penetrate the fibers. This not only significantly enhances color saturation and detail but also ensures white ink covers evenly, creating a bright, solid base.
Pretreatment also strengthens the bond between the ink and fibers, resulting in prints that are more durable, wash-resistant, and abrasion-resistant after curing. In essence, pretreatment is a critical foundation for high-quality DTG printing—without it, achieving bright colors, sharp edges, and long-lasting prints would be difficult.
DTG Pretreatment for Dark and Light Garments
Pretreatment methods differ for dark-colored and light-colored garments because ink behaves differently on varying base colors.
Pretreatment for Dark Garments
For dark fabrics (black, navy, deep red), white ink is typically required as a base layer to ensure the colored inks appear accurately.
Purpose: Create a base layer for white ink to increase opacity and allow colored inks to display vivid colors.
Key Points:
Spray a relatively larger amount evenly to avoid uneven thickness or streaks;
Fully dry or heat-press after spraying to fix the white ink base.
Effect: The solid white base allows colored inks to sit on the surface rather than penetrate fibers, producing bright colors, clear details, and improved wash resistance.
Pretreatment for Light Garments
For light fabrics (white, light gray, pastel), a white ink base is usually unnecessary, but pretreatment is still needed to improve color adhesion and durability.
Purpose: Enhance color vibrancy and saturation while increasing the print’s durability through repeated washing.
Key Points:
Spray a smaller amount than for dark garments to maintain the soft hand feel; Ensure even coverage, followed by drying or heat-pressing to fix the solution.
Effect: Produces sharper, more vibrant prints while maintaining the fabric’s original softness.
In summary, pretreatment for dark garments focuses on white ink adhesion and coverage, while pretreatment for light garments focuses on color saturation and durability. The goal for both is to optimize the fabric surface for even ink adhesion and high-quality DTG prints.
DTG Pretreatment Steps
DTG pretreatment is not just about spraying; it’s a systematic process to ensure print quality. Each step directly affects ink adhesion, color performance, and print durability. Properly pretreated garments produce vibrant, detailed, and long-lasting prints.
1. Preparation: Cleaning and De-fuzzing
Before spraying, prepare the garment. New T-shirts or hoodies often contain dust, oils, softeners, or chemical residues that hinder ink adhesion. Remove these with light washing, air blowing, or degreasing treatments.
Additionally, surface fuzz on knitted fabrics can affect print clarity. Use a heat press or de-fuzzing machine to smooth the surface, ensuring even pretreatment coverage.
2. Evenly Spray Pretreatment Solution
Use a spray gun or DTG pretreatment machine to apply the solution evenly over the print area.
Spray an appropriate amount: too little affects color, too much can harden the fabric or leave streaks;
Cover slightly beyond the print area for complete coverage.
Automated spraying systems use fine mist nozzles to ensure consistency and precision for large-scale production.
3. Spread and Penetrate the Layer
After spraying, use a squeegee or roller to distribute the solution evenly and allow it to penetrate the fabric surface, forming a uniform ink-receptive layer and preventing color inconsistencies.
4. Drying or Heat-Press Curing
Immediately dry the garment after spraying to fix the solution on the fibers.
Heat press: 160°C for 20–40 seconds (adjust based on fabric thickness);
Tunnel or hot air dryer: use circulating hot air to remove moisture evenly and prevent crystallization or hardening.
Cover the garment with parchment or Teflon sheets to prevent sticking or marking.
5. Inspection and Printing
After drying, the fabric surface should be smooth, dry, and free of residues or crystallization. Re-spray or clean any areas with residue or clumps.
Once ready, proceed with DTG printing. The ink will adhere evenly to the pretreated surface, producing vibrant colors, solid white layers, and sharp details.
Tips
Use the appropriate pretreatment solution for different fabric types (cotton, cotton-polyester, blends);
Store pretreated garments in a dry, shaded area if printing is delayed to prevent moisture absorption or contamination;
Regularly clean nozzles and spray heads to prevent clogging from residual pretreatment solution.
Conclusion
DTG pretreatment is a crucial step for achieving high-quality digital garment prints. By following a proper pretreatment process—cleaning, de-fuzzing, even spraying, and drying/heat-pressing—the fabric surface develops an ideal ink-receptive layer. This ensures the ink adheres evenly, colors appear vibrant, details stay sharp, and prints remain durable and wash-resistant. Proper pretreatment is essential for both dark and light garments, significantly enhancing overall print quality.
For the best printing experience, we recommend the H·easy DTG printer. When used with professional pretreatment solutions and optimized workflows, it handles both dark and light garments effortlessly while maintaining the fabric’s soft hand feel. With H·easy, every print can achieve professional-level vibrancy, detail, and long-lasting durability.